
1. WHAT IS AUTO SCORING?
Auto Scoring is a powerful feature in Lean Agile Intelligence (LAI) that enables you to instantly calculate and record results for quantitative assessments with a single click. With Auto Scoring, there’s no need for spreadsheets or manual calculations—LAI handles all the math, providing error-free, consistent, and transparent scoring for every assessment.
WHY USE AUTO SCORING?
Unmatched Speed: Instantly calculate and record results across all quantitative capabilities.
Consistent, Error-Free Scoring: LAI applies the same logic every time, ensuring reliable results.
Actionable Insights, Faster: Gain immediate visibility into progress, trends, and improvement opportunities.
Transparency and Trust: Review the exact metrics and calculations used directly from the Manage Assessment screen.
2. REQUIREMENTS FOR AUTO SCORING
Auto Scoring can only be used with Capability Templates that meet all of the following criteria:
Quantitative Capability Template: The template must have a Measurement Type of Quantitative (Performance).
Auto Scoring Enabled: Auto Scoring control must be enabled in the template.
Quantitative Dimension: Every capability in the template must use a Dimension with a Measurement Type of Quantitative (Performance) (e.g., the default “Metrics” dimension or a custom quantitative dimension).
Scoring Ranges Set Up: Each capability must use scoring ranges.
Associated Metrics: Each capability must be associated with a Metric. Out-of-the-box (OOTB) Quantitative Capabilities come pre-associated; custom capabilities require custom Metrics to be created and associated.
Metrics Imported: All metric data for the relevant period must be imported in Results Metrics widget.
Note: If any configuration is missing or incomplete, you will be prompted to address it before proceeding with completing an Auto Scoring Assessment.
3. HOW TO CONFIGURE AUTO SCORING FOR A CAPABILITY TEMPLATE

Step 1: Create or Edit a Quantitative Capability Template
In the Template Builder, create a new capability template or select an existing one.
Set the Measurement Type to Quantitative (Performance).
In Template Controls under Auto Score, toggle to Enable auto scoring.
Step 2: Select and Configure Capabilities
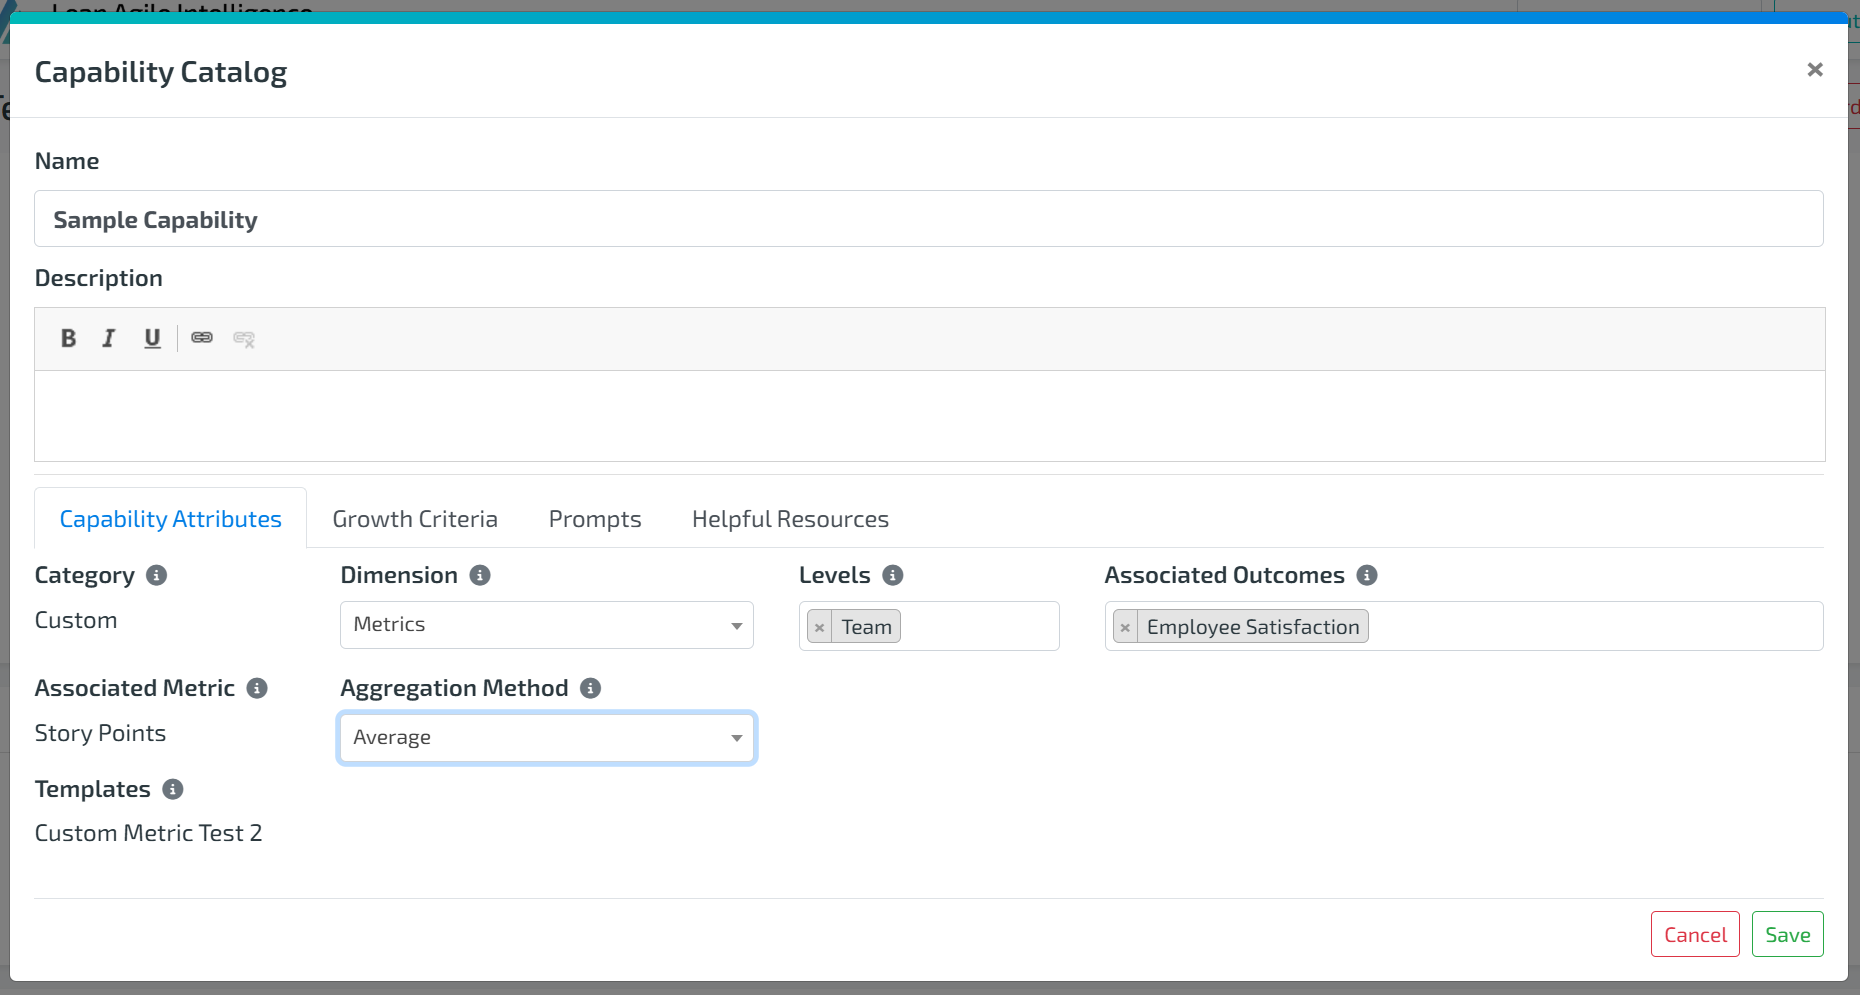
In Browse Capability Catalog, select Capabilities with a Dimension with a Measurement Type of Quantitative (Performance) (e.g., “Metrics”) to add to the template
If creating a new Capability, ensure in Capability Attributes the Dimension is that of Quantitative measurement type.
After selecting the Dimension of Quantitative measurement type, set the Aggregation Method (e.g., Average, Sum) to determine how metric values are calculated.
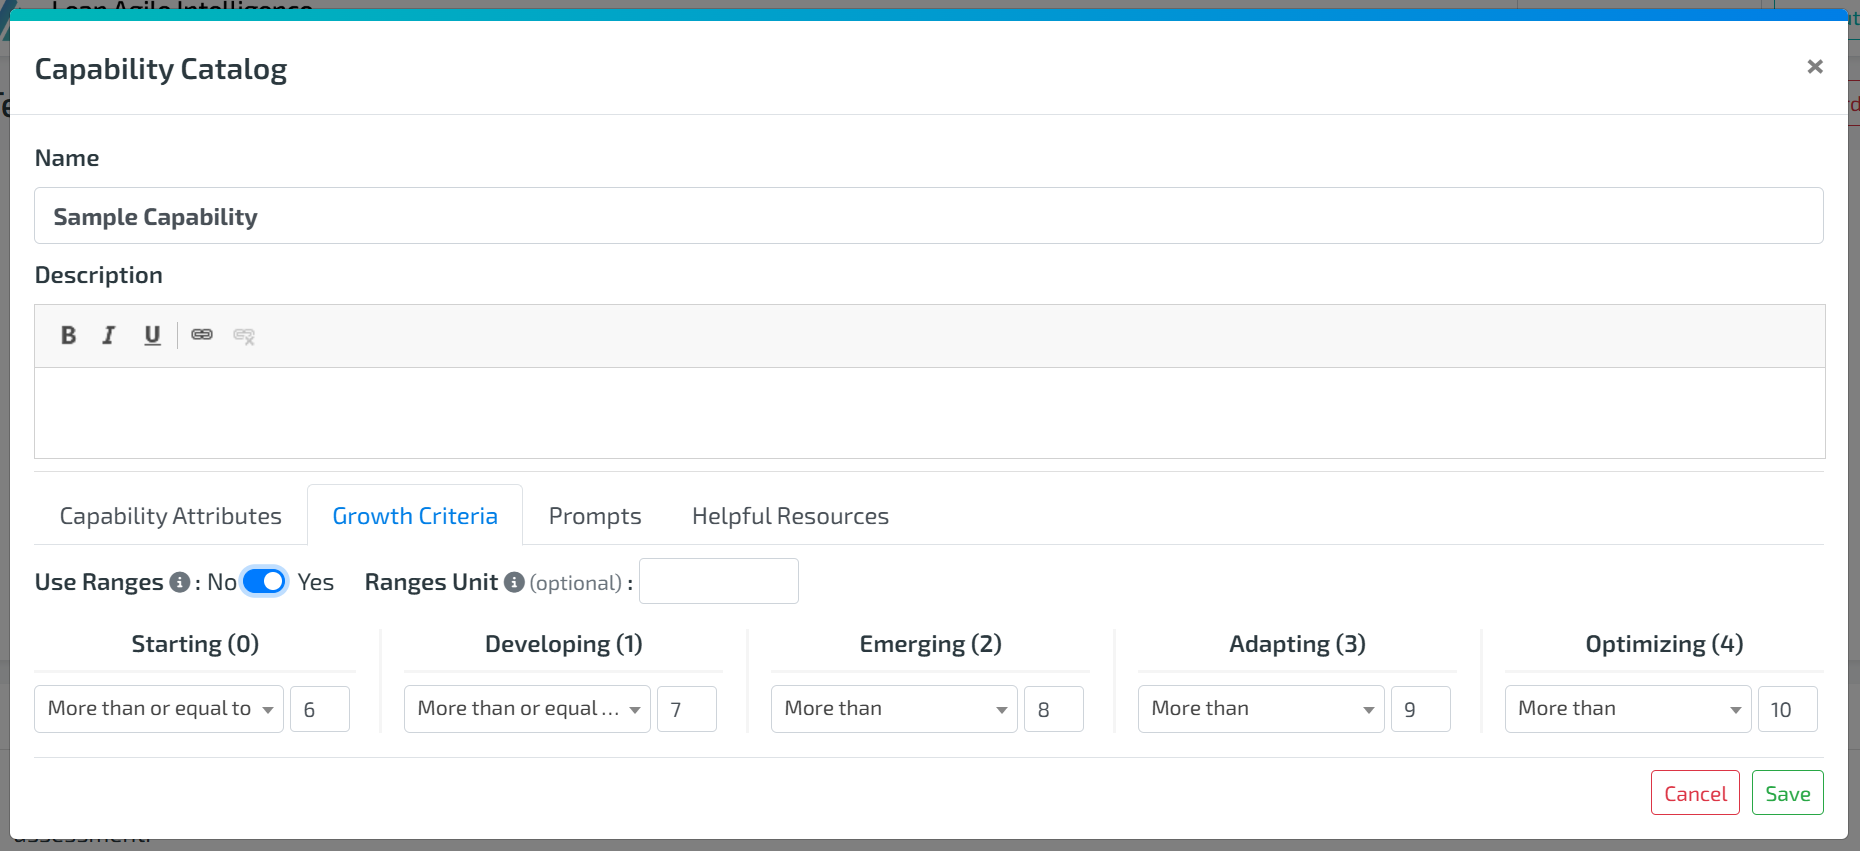
Ensure that all the Capabilities are Using Ranges to score.
If a Capability is not using ranges, click edit and in Growth Criteria, toggle “Use Ranges” to Yes.
(Optional) Enter a Ranges Unit for labeling (e.g., %, iterations, sprints, etc.).
Define scoring ranges for each stage. Ranges must be contiguous and cannot overlap or have gaps.
Step 3: Associate Metrics
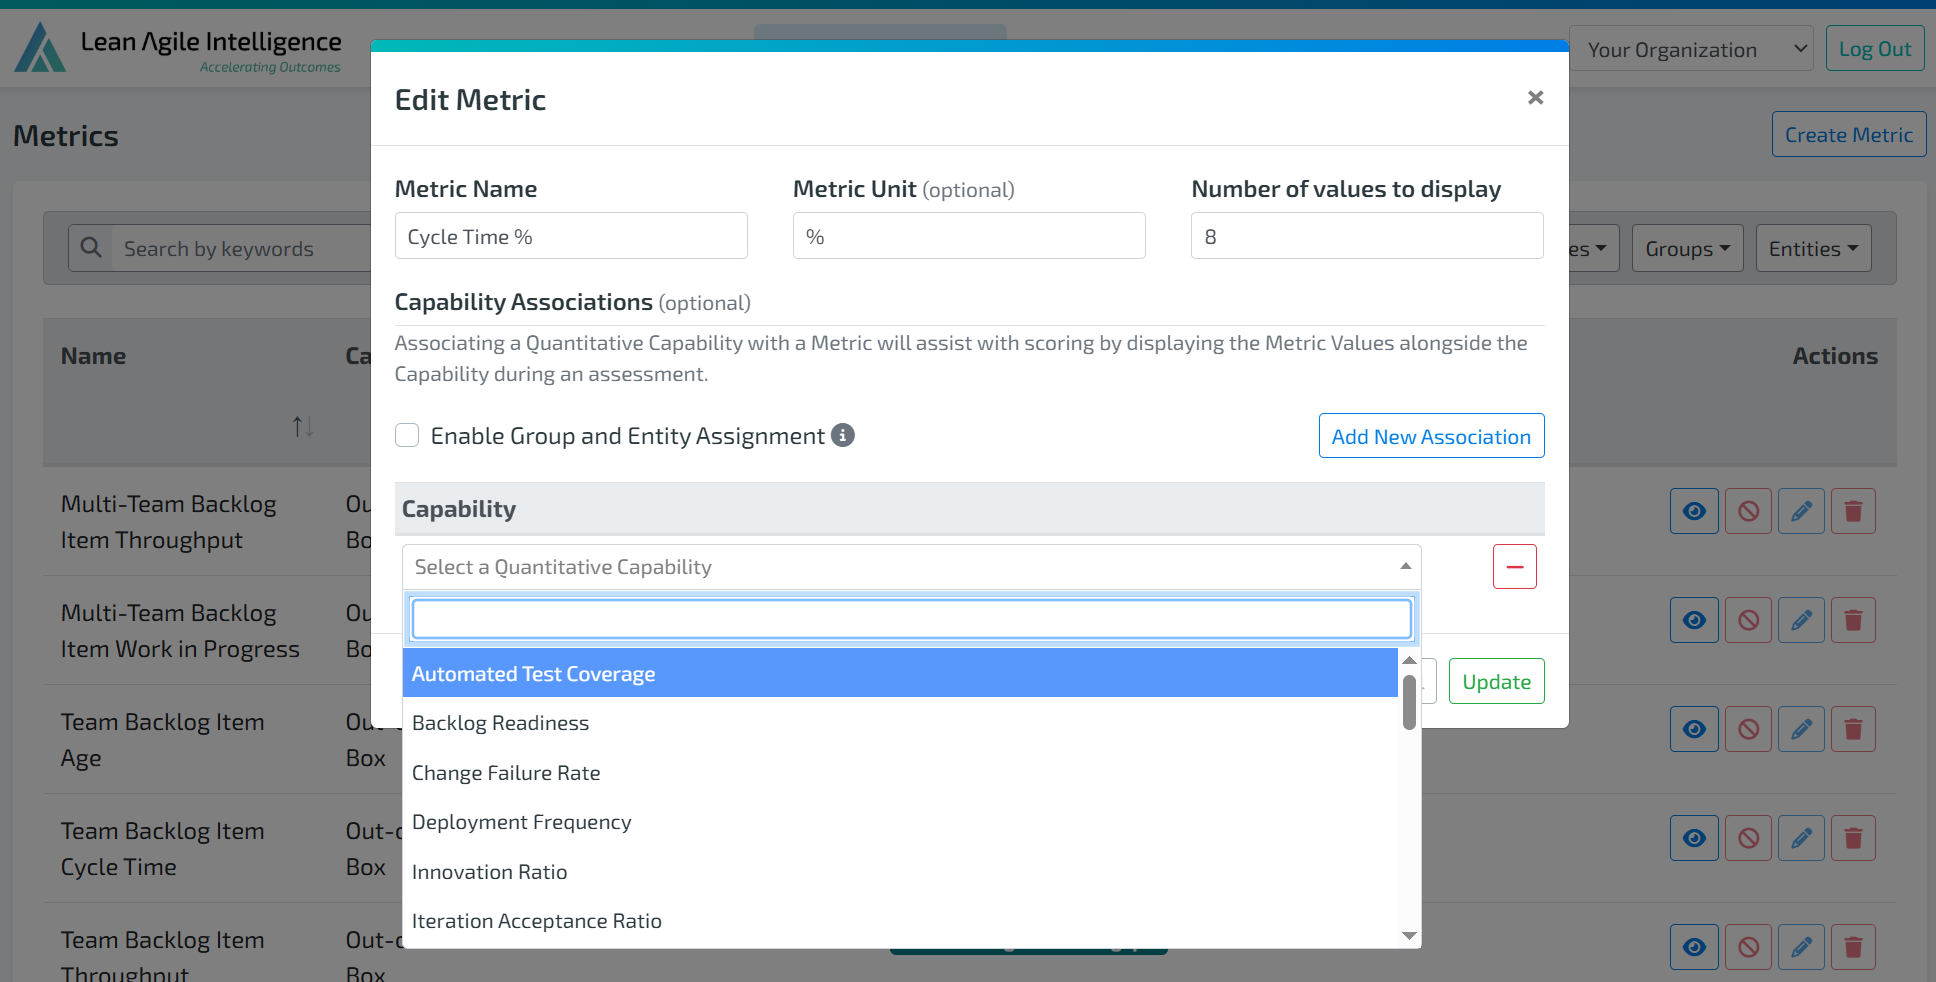
Go to the Metrics screen through the Organization Setup tab in the navigation bar.
Create a new Metric or select an existing one.
Click Add New Association then select the Capability you wish to associate the Metric to.
For more information on Metrics, please check out this documentation.
4. HOW TO USE AUTO SCORING
Step 1: Launch an Auto Scoring Assessment
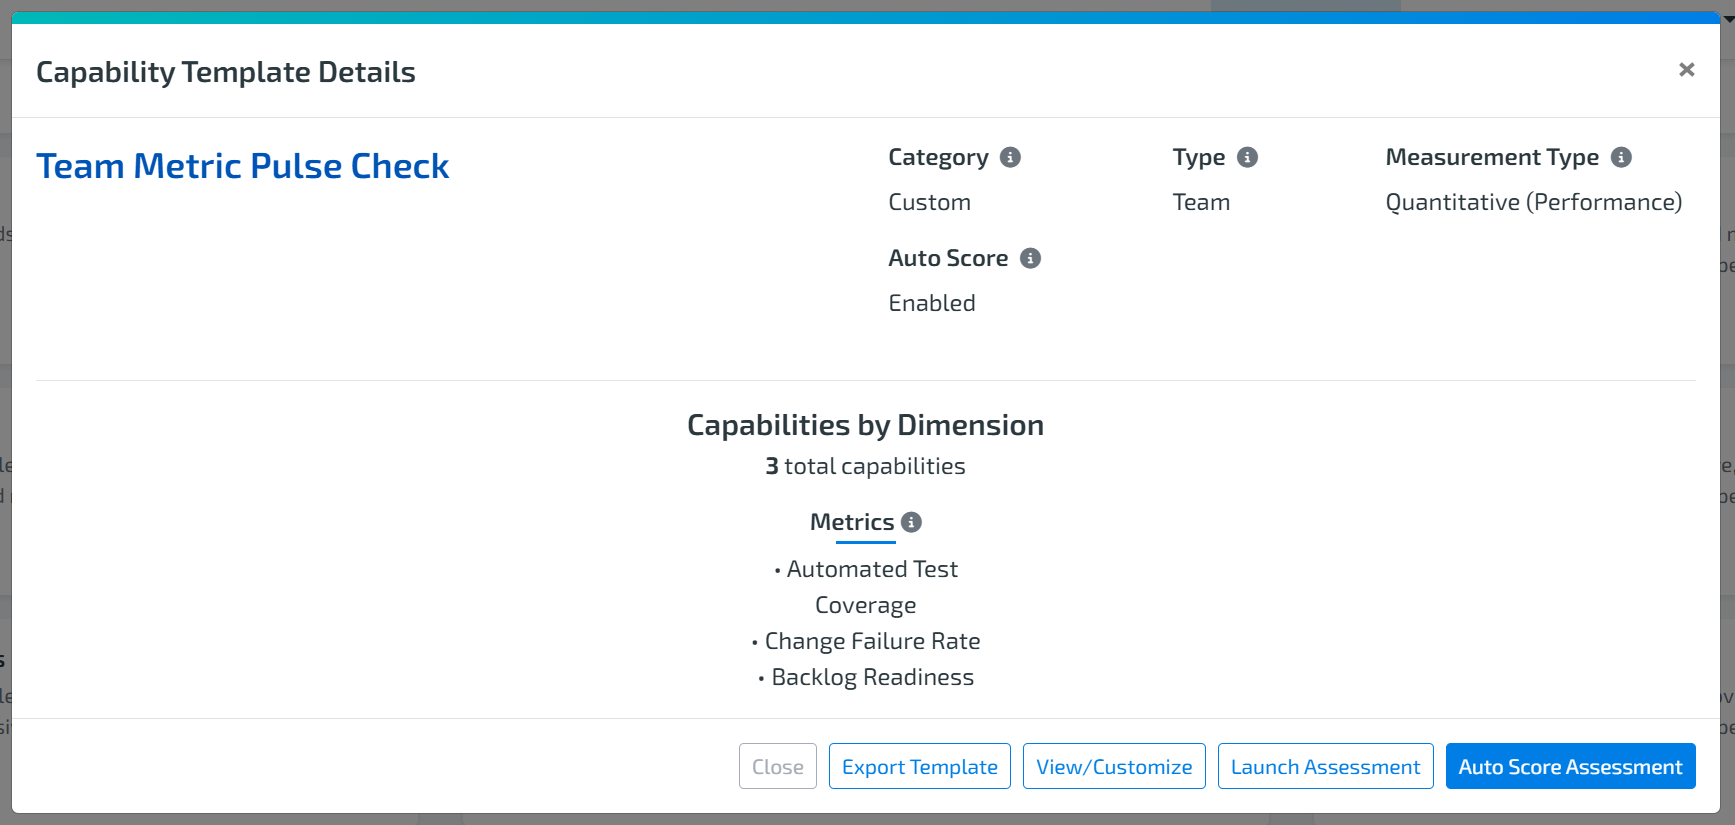
Navigate to the Capability Templates screen.
Select the Capability Template and open Capability Template Details.
Click Auto Score Assessment (this button appears only if Auto Scoring has been Enable in the Template Builder).
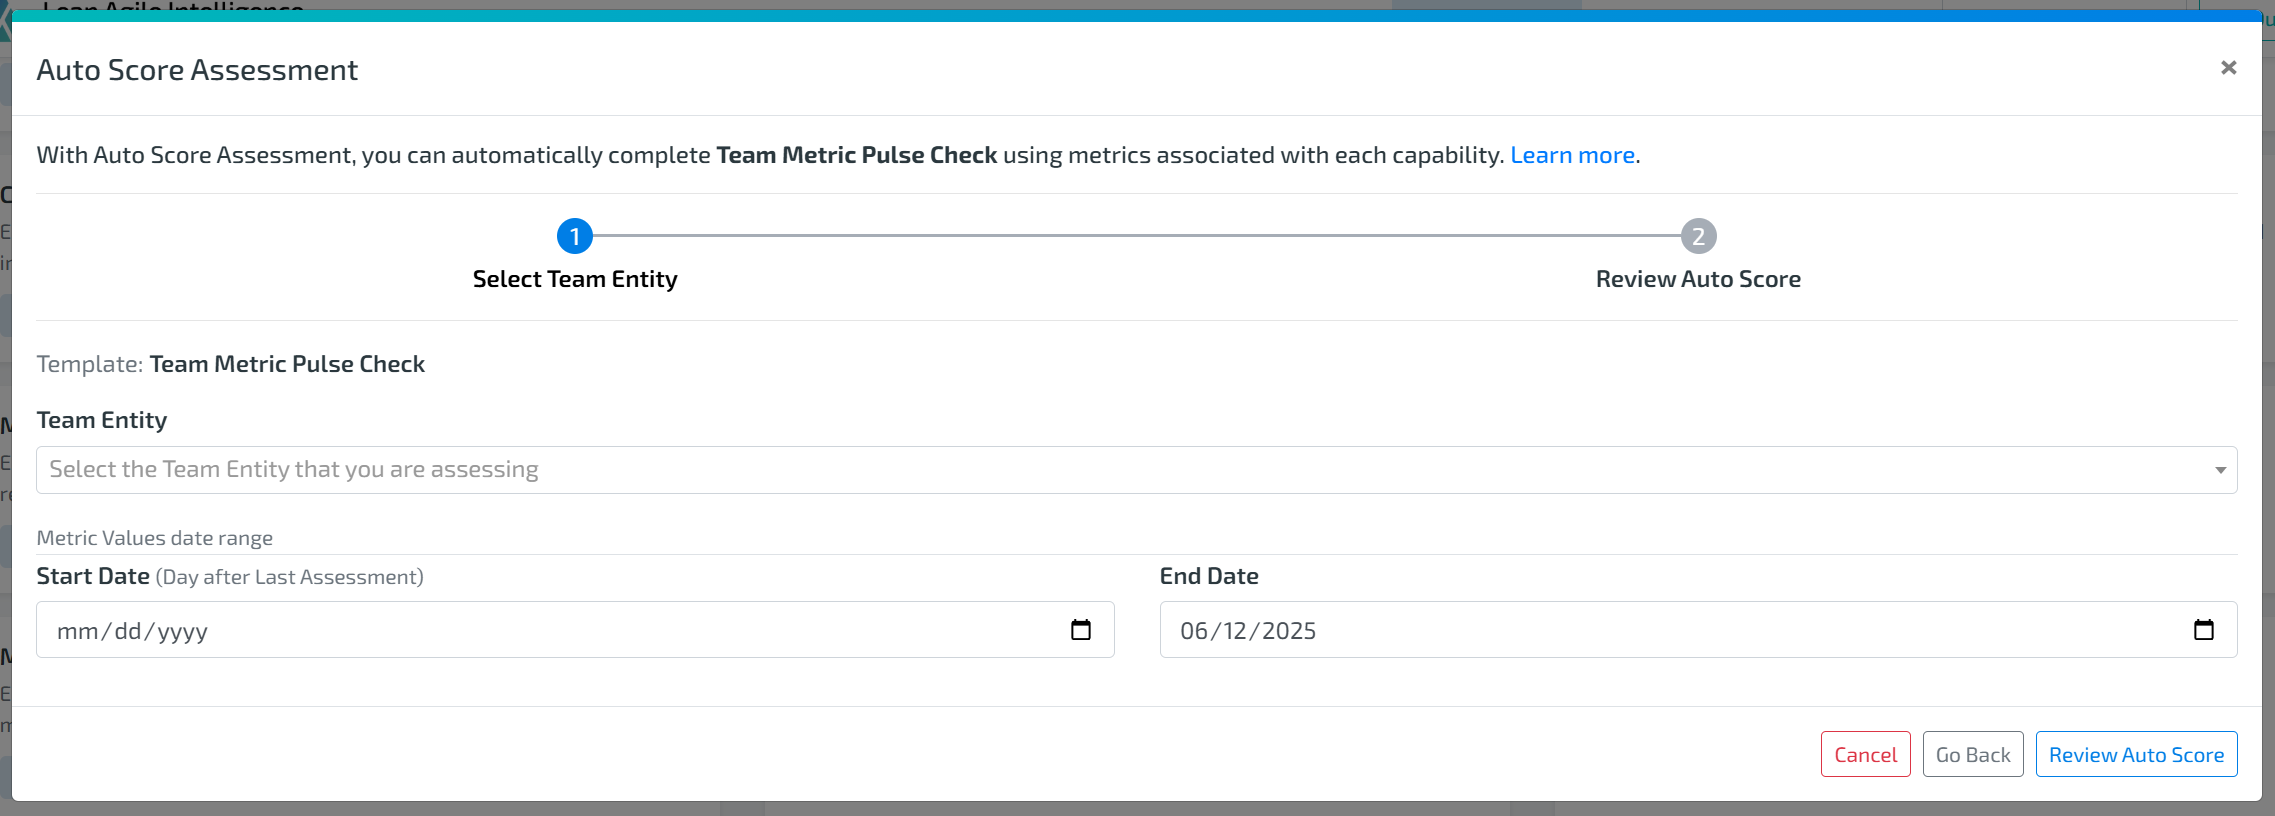
Step 2: Select Entity and Date Range
Please Note: If any of the Capabilities in the Template are missing required configuration, you will be unable to continue. A table will appear showing which capabilities are missing specific items—either Use Ranges or Associated Metrics.
Choose the Entity you wish to score.
Select the date range for the metric values to be used.

Step 3: Auto Scoring Review
Review all metrics used in the calculation and the mapped stage results.
Please Note: If there are configuration issues (e.g., missing metrics, incomplete scoring ranges), you’ll see an error message with details.
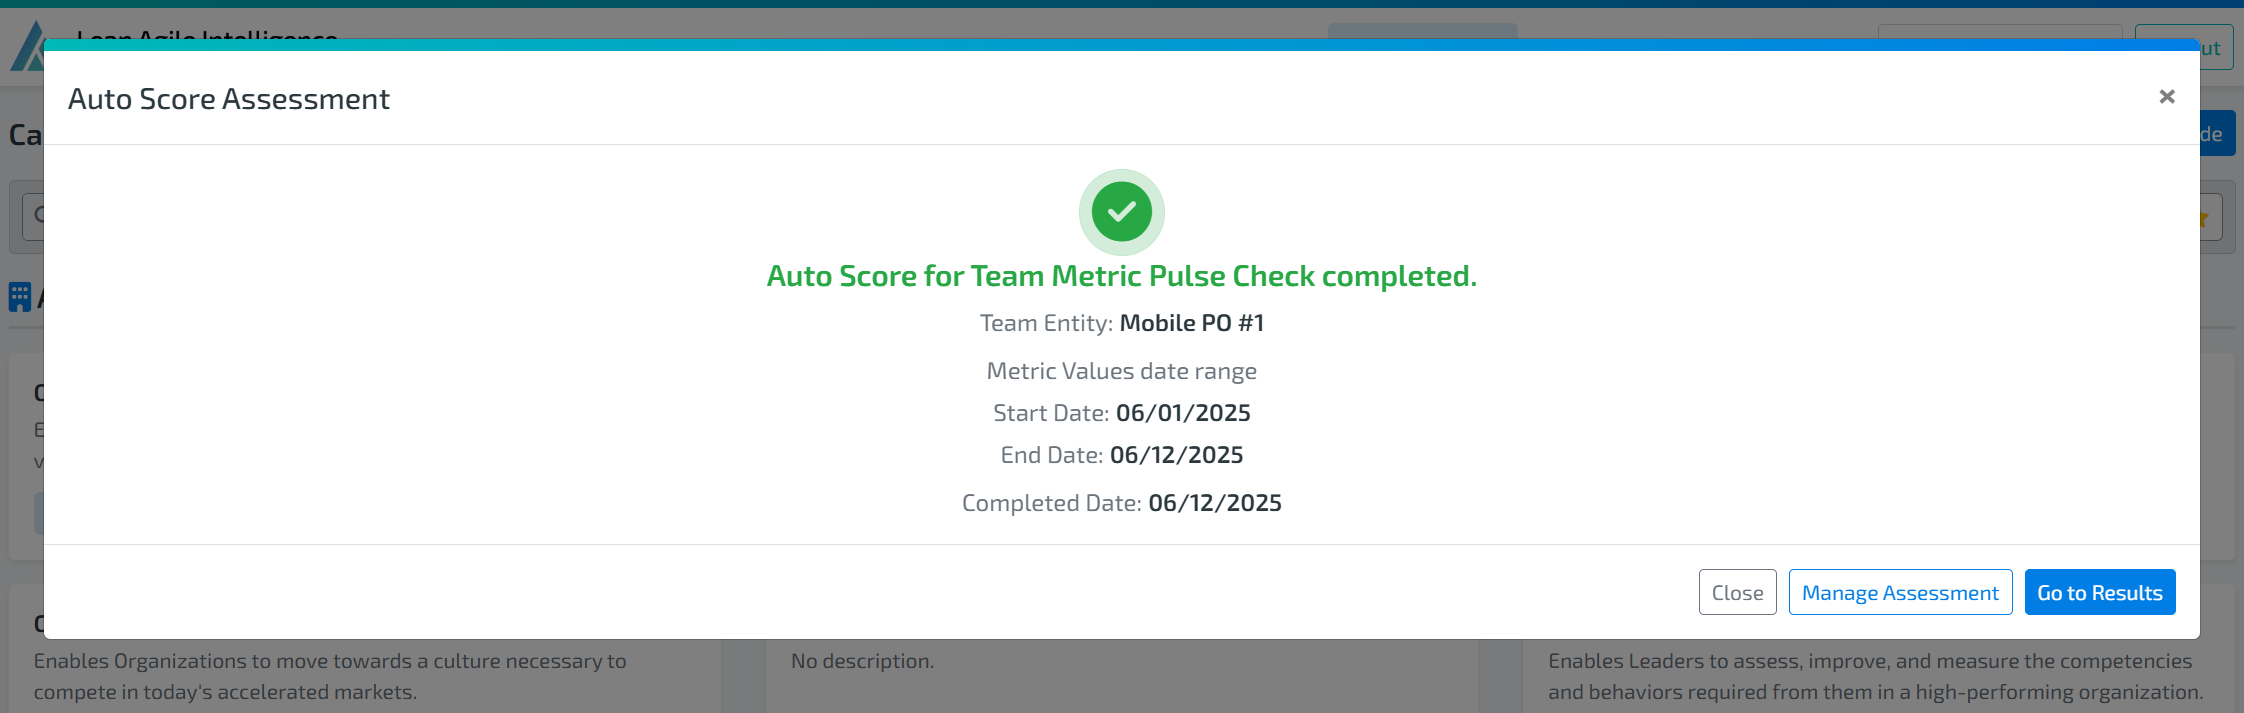
Step 4: Complete Auto Scoring
Once satisfied with the review, click Complete Auto Score.
Choose to go to Results or Manage Assessments to view details.
5. AUTO SCORING REVIEW AND TROUBLESHOOTING

Missing Configuration: If any capability is missing scoring ranges, or metric association, you will see an alert specifying what needs to be fixed.
Missing Metric Values: Ensure all relevant metric values are imported before running Auto Scoring.
No Auto Scoring Button: If you don’t see the Auto Scoring button, verify that Auto Scoring is enabled and all required configurations are complete.
6. VIEWING AUTO SCORED ASSESSMENTS
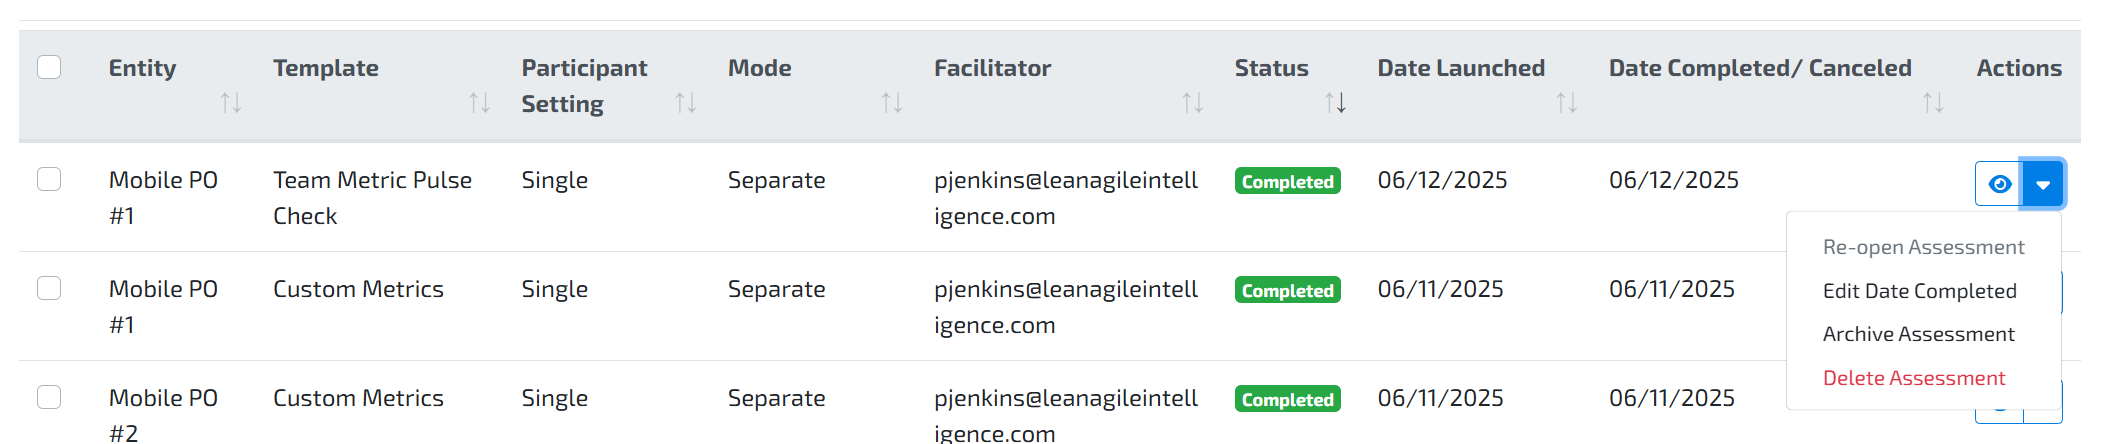
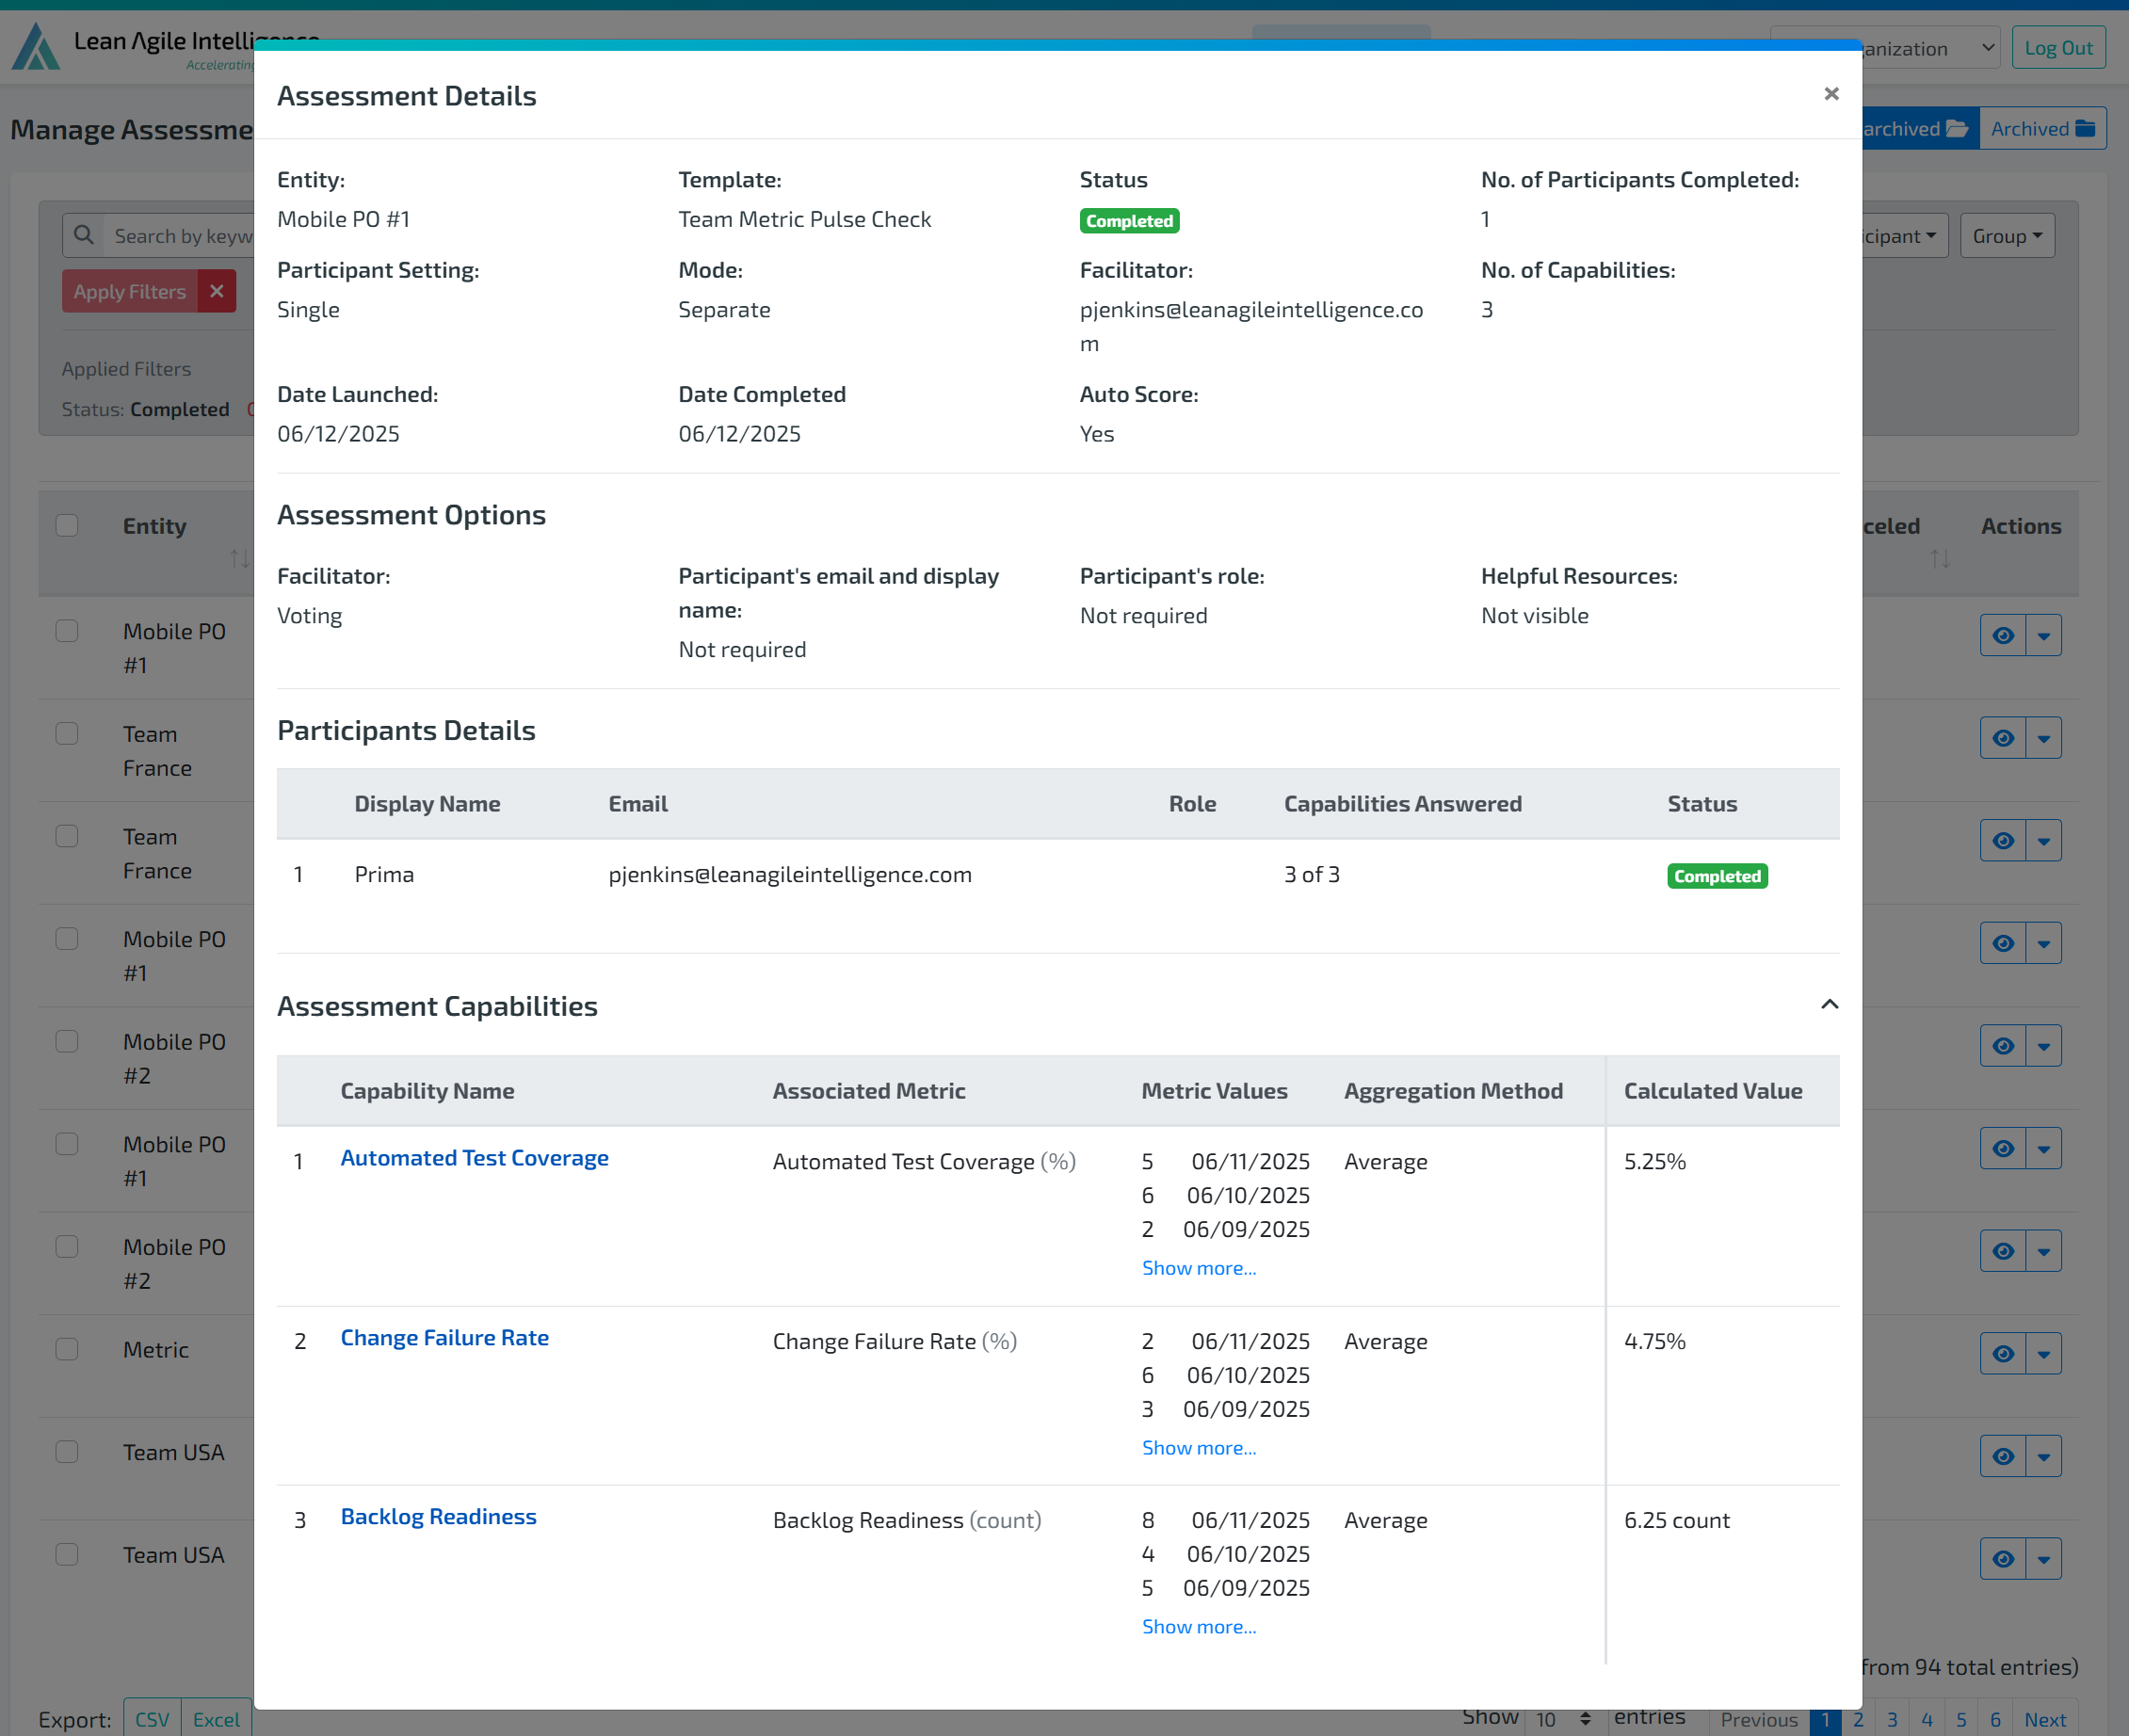
In Manage Assessments, view the completed Auto Scoring assessment by clicking on the Eye Icon to see the assessment details.
In Assessment Details, you can see the Capabilities that were used, Associated Metrics, Metric Values, Aggregation Method, and the Calculated Value.
To ensure results are reported in the correct time period, you can change the completion date by clicking Edit Date Completed under the dropdown arrow in the Action column.
You can also archive or delete the assessment by selecting the appropriate action from the dropdown menu in the Action column.
For more information on Manage Assessments, please check this documentation.
7. IMPORTING METRICS FOR AUTO SCORING
To import metrics for auto scoring, head to the Results page and scroll down to the Metrics section.
You can either select Edit Metric Values or use the Bulk Add Metric Values option by clicking the dropdown arrow.
Edit Metric Values allows you to manually add metric values for a single metric at a time. Make sure you are on the correct entity before adding values.
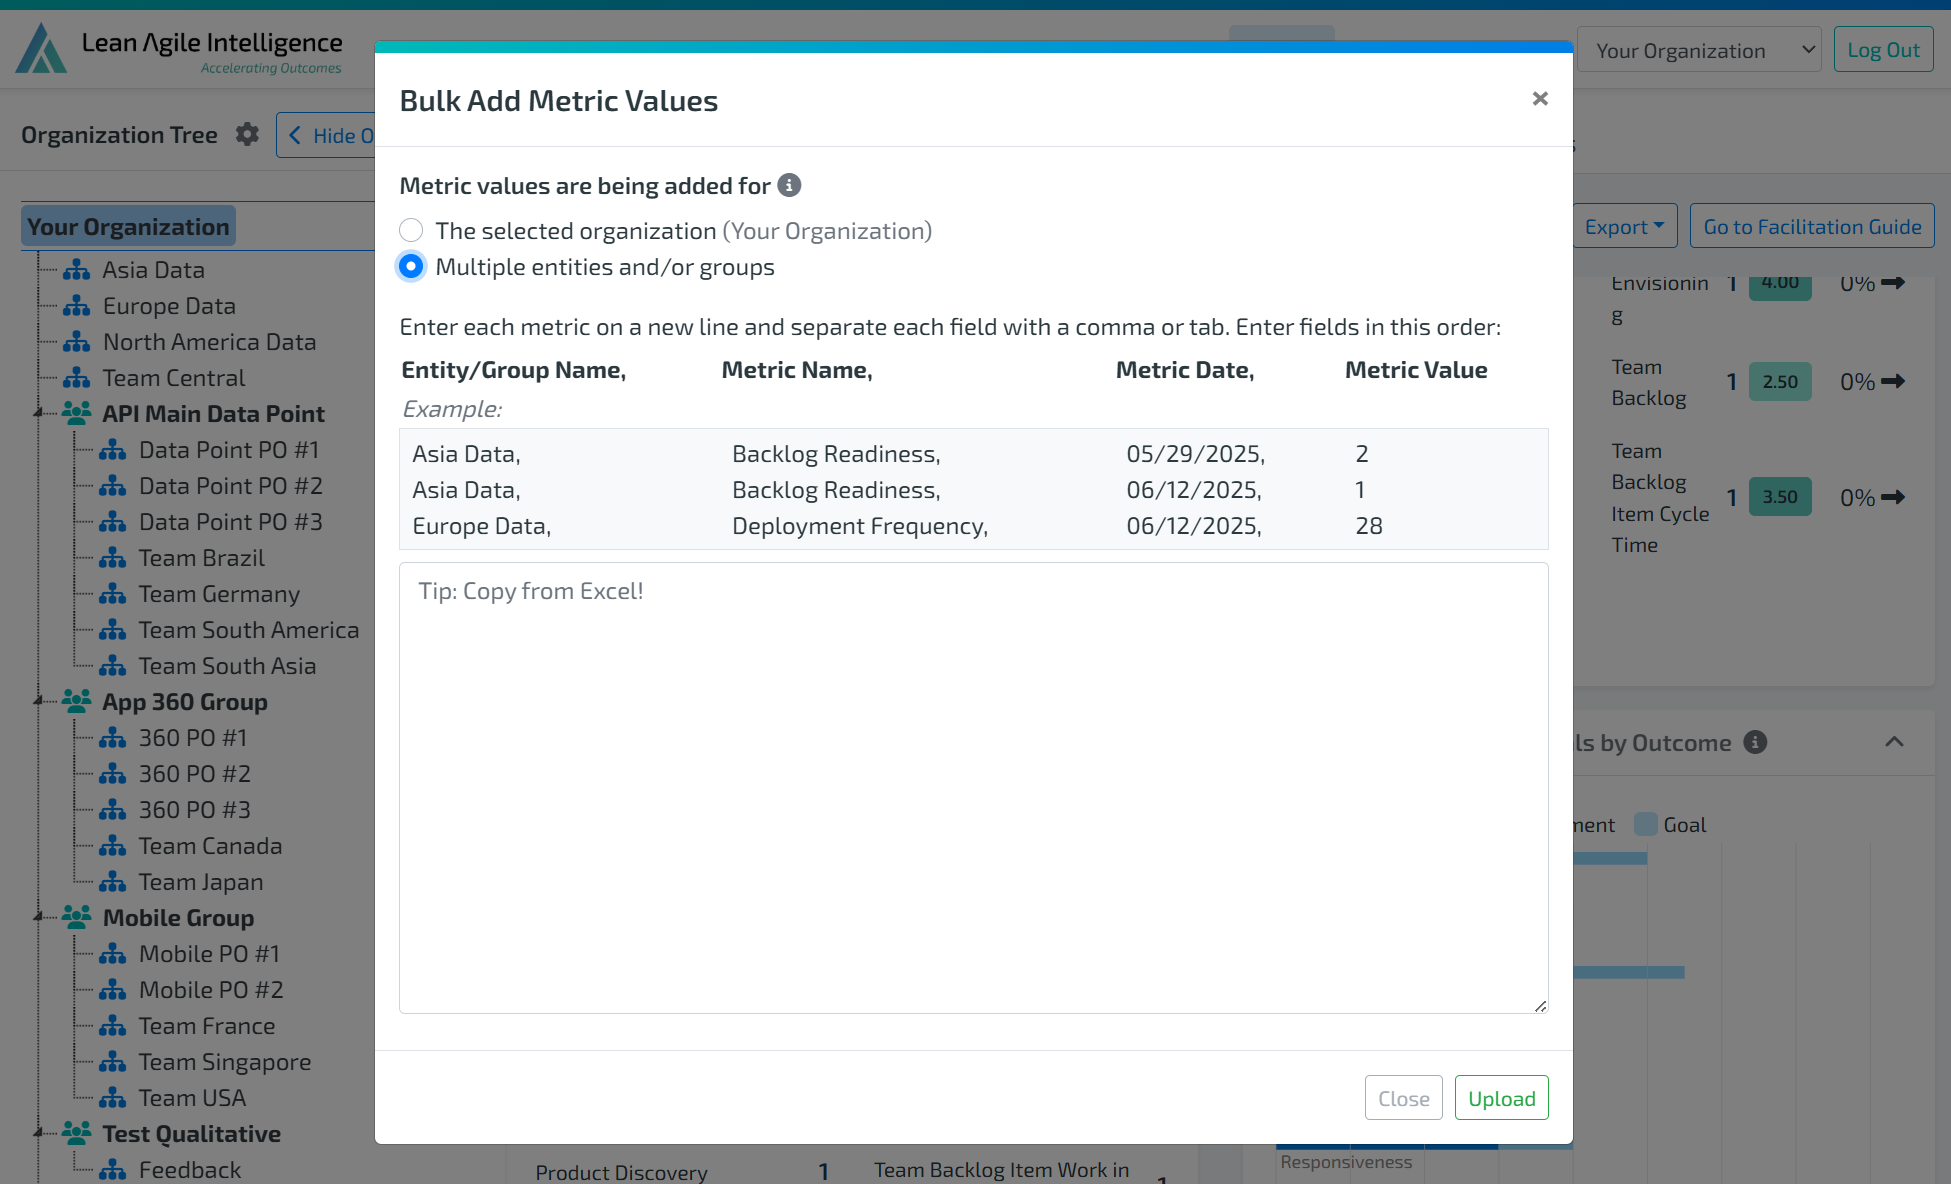
Bulk Add Metric Values enables you to upload metric data for multiple entities and multiple metrics at once.
Ensure all necessary data is imported prior to running Auto Scoring.
For more information on importing Metrics, please check out this documentation.