
1. BENEFITS OF CUSTOM MEMBER ATTRIBUTES
Custom Member Attributes allow organizations to create tailored attributes for segmenting and organizing assessment participants. These attributes help in providing a more granular view of the assessment results, enabling administrators to group participants in ways that are relevant to their organization. For example, attributes can be created based on role, location, or tenure within the company, allowing for a customized analysis of assessment results.
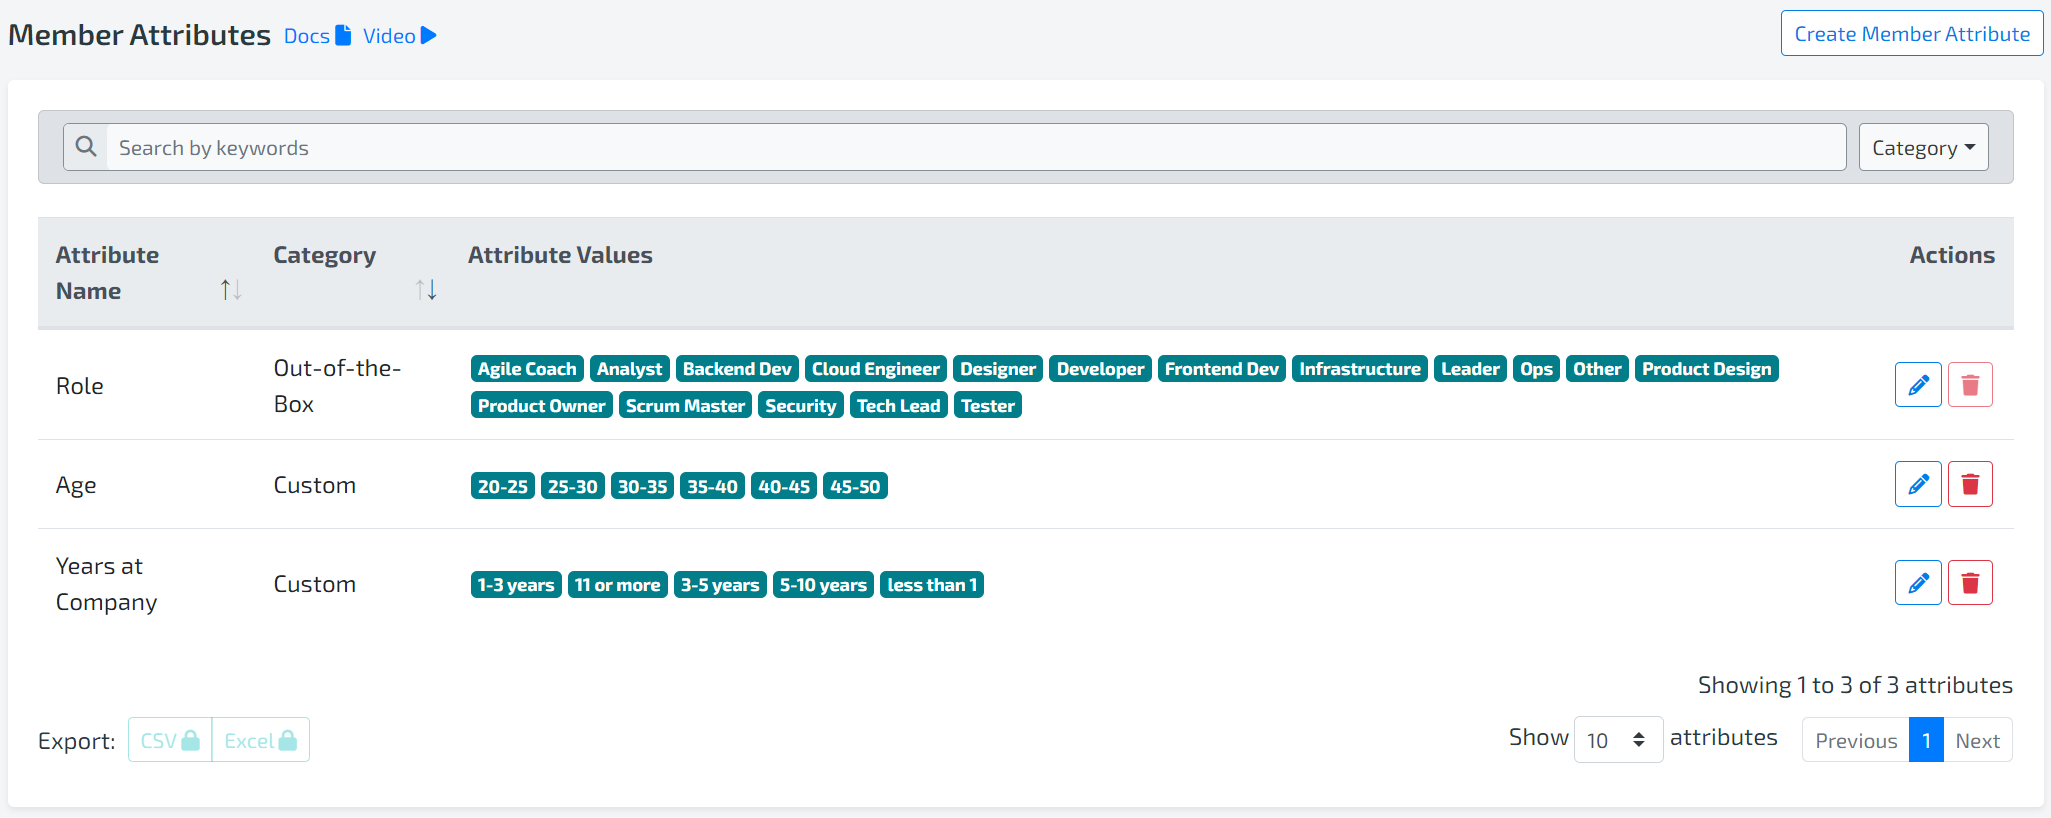
Out-of-the-box, there are 12 predefined roles that cannot be modified, but custom roles and attributes can be added to better suit the needs of your assessments. Custom Member Attributes enhance flexibility and allow administrators to adjust the participant view to match the specific structure and needs of their organization, improving insights and decision-making.
2. HOW TO SET IT UP
Step 1: Navigate to Member Attributes
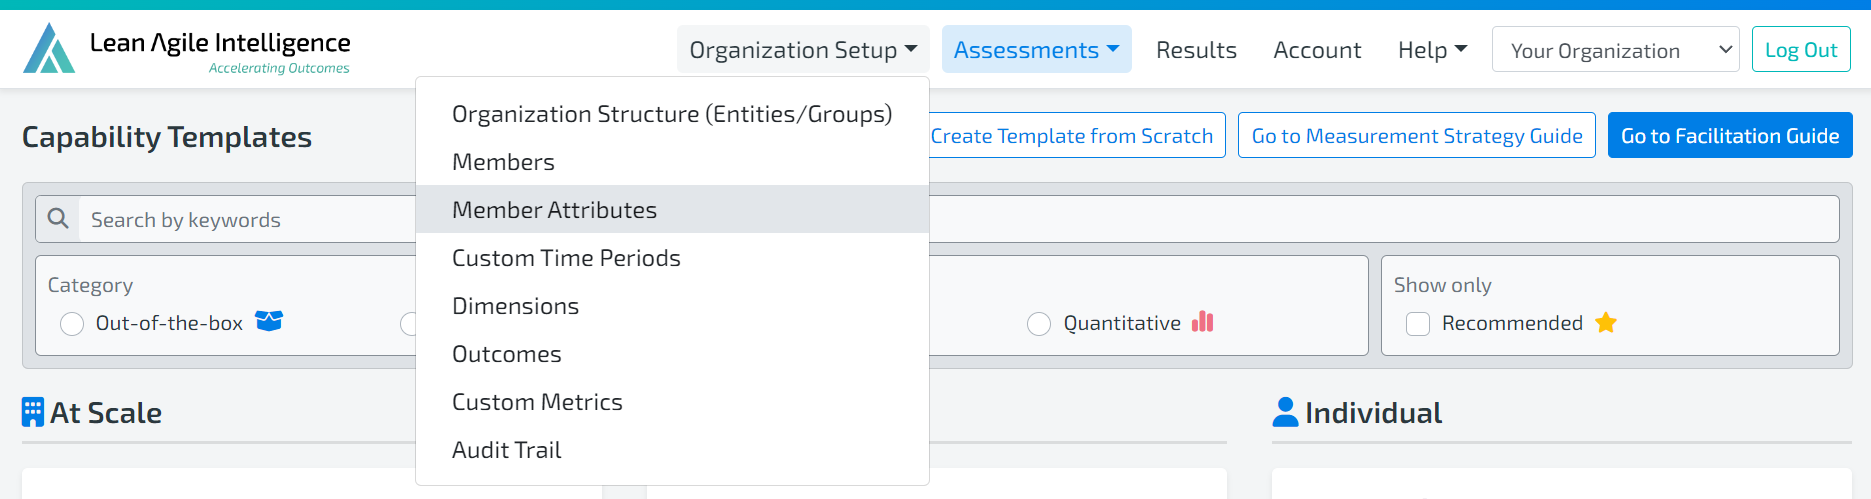
In the navigation bar, go to Organization Setup and select Member Attributes.
Step 2: Create a Custom Member Attribute

LAI provides an Out-of-the-box attribute called Role with 12 predefined roles. These roles cannot be deleted or modified, but additional roles can be added.

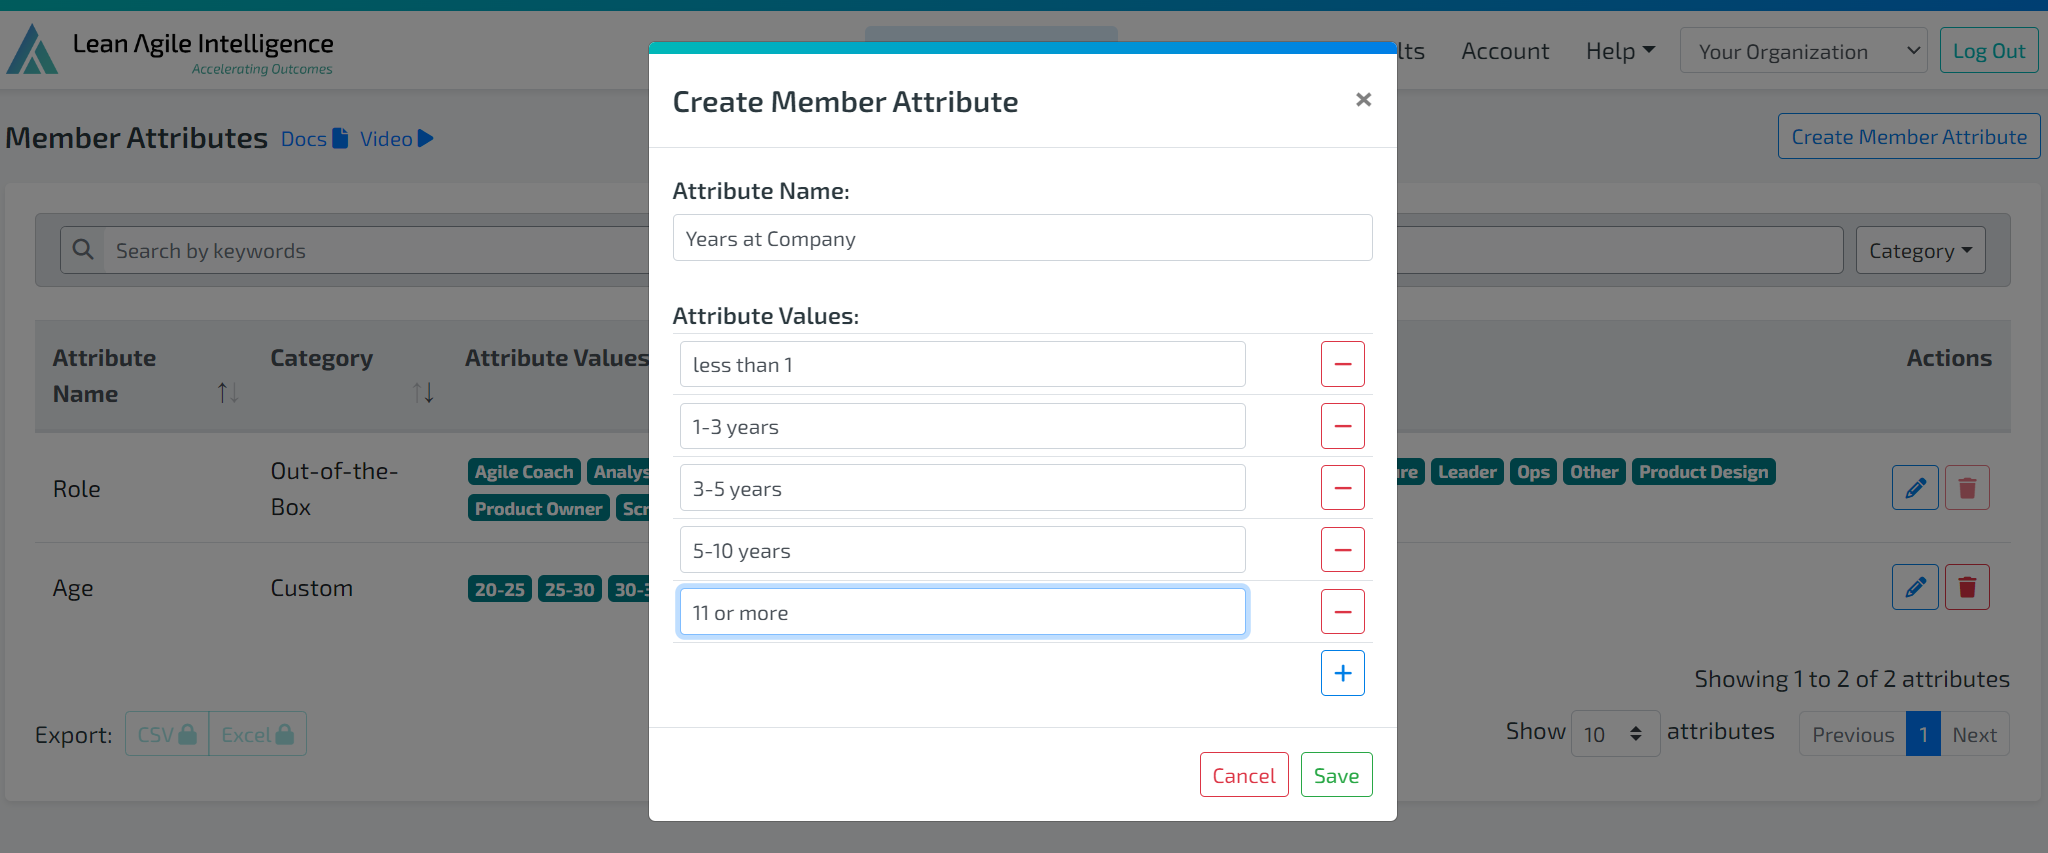
To create a new attribute, click on the Create Member Attribute button in the top-right corner. A pop-up window will appear.
To create a new attribute, click on the Create Member Attribute button in the top-right corner. A pop-up window will appear.
Enter the Attribute Name and the desired Attribute Values.
To add more Attribute Values, click the + button.
Once all values are entered, click Save to create the new attribute.
Step 3: Edit or Delete Member Attributes
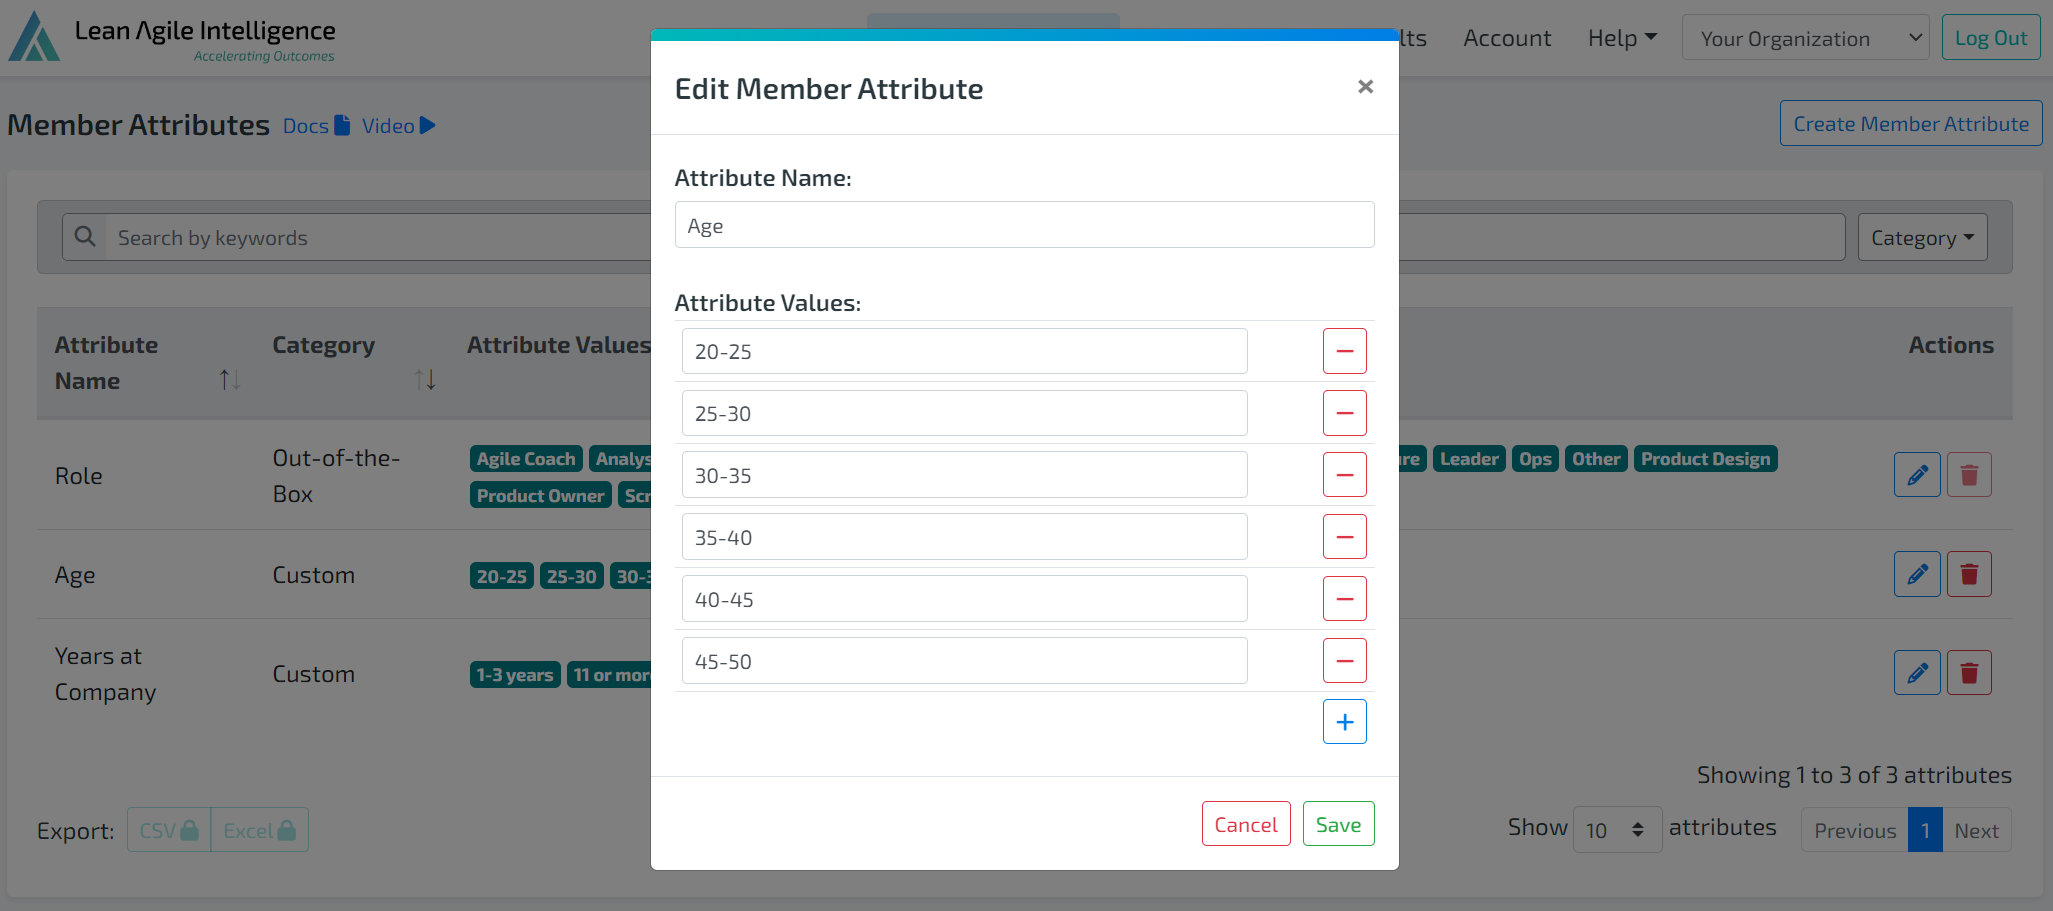
To Edit an existing attribute, click the Pencil icon next to the attribute in the table.
You can modify both the Attribute Name and the Attribute Values.
To remove an Attribute Value, click the - button.
To add more Attribute Values, click the + button.
After making changes, click Save.
To Delete an attribute, click the Trash Can icon next to the attribute.
3. HOW DOES IT WORK
Custom Member Attributes can be used to group and segment your assessment results, allowing you to view and analyze participants based on specific attributes. To use Member Attributes, they must first be enabled at the Capability Template level.
Enabling Member Attributes in Capability Templates
Hover over Assessments in the navigation bar and select Capability Templates.
Choose the Capability Template you want to enable Member Attributes for and click View/Customize.

In the Template Builder, click the Edit button in the top-right corner and scroll down to the Template Member Attributes widget.

Select the desired Member Attributes by checking the boxes next to them (e.g., Role).
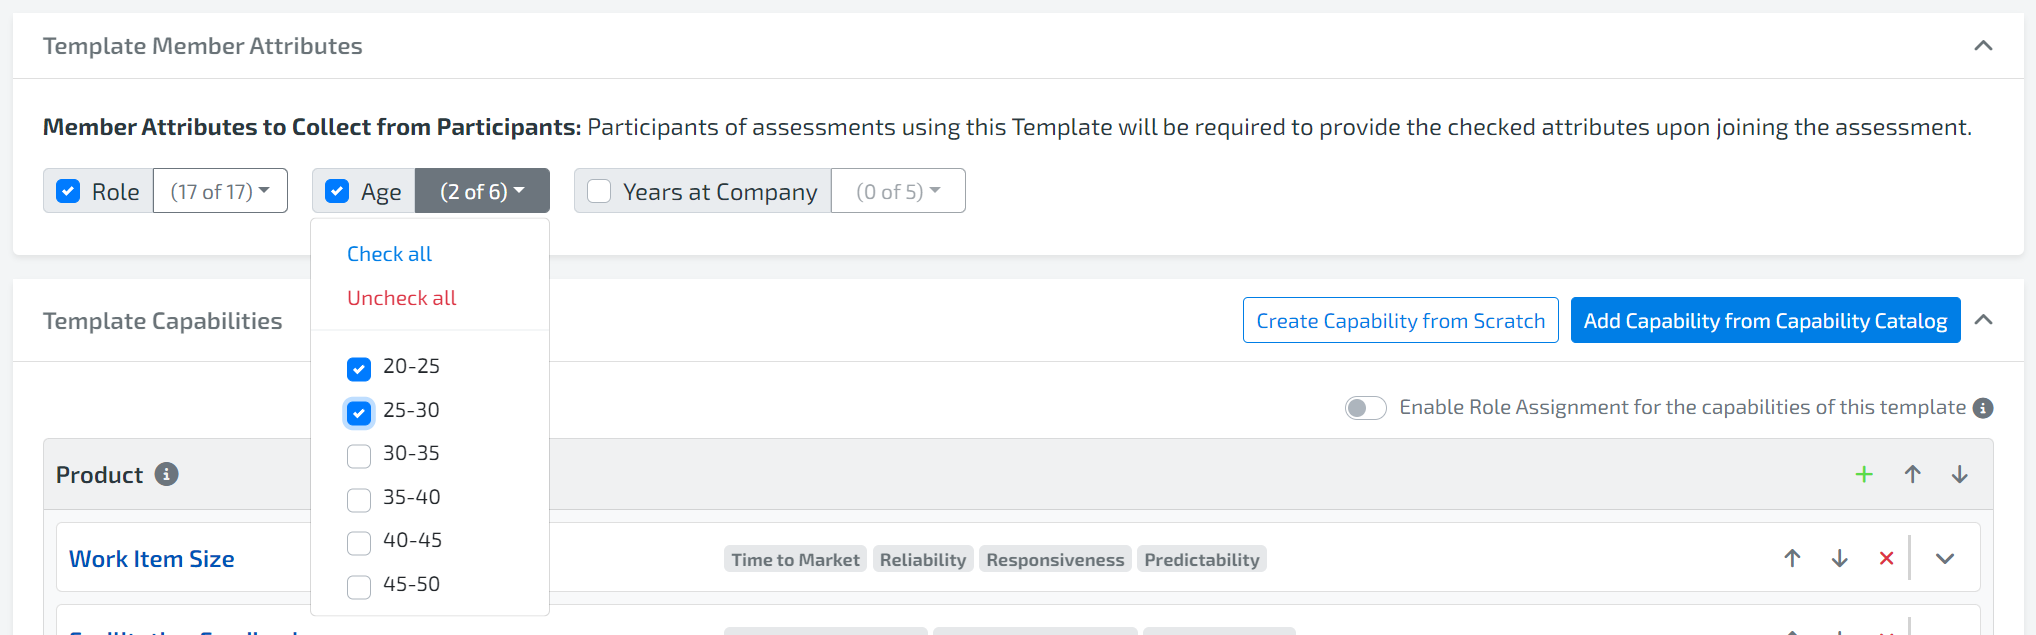
For each attribute, you can limit what participants will see by drilling down into the attribute and selecting the specific Attribute Values.
If necessary, click Check All to include all values.
Once satisfied, click Save at the top-right corner of the page.

When participants join the assessment, they will be prompted to provide information related to the enabled Member Attributes and can only select from the Attribute Values defined in the template.
VIewing Member Attributes being collected in Capability Templates
You can also view the details relating to Member Attributes for a specific assessment in Assessment Details after they have been enabled.
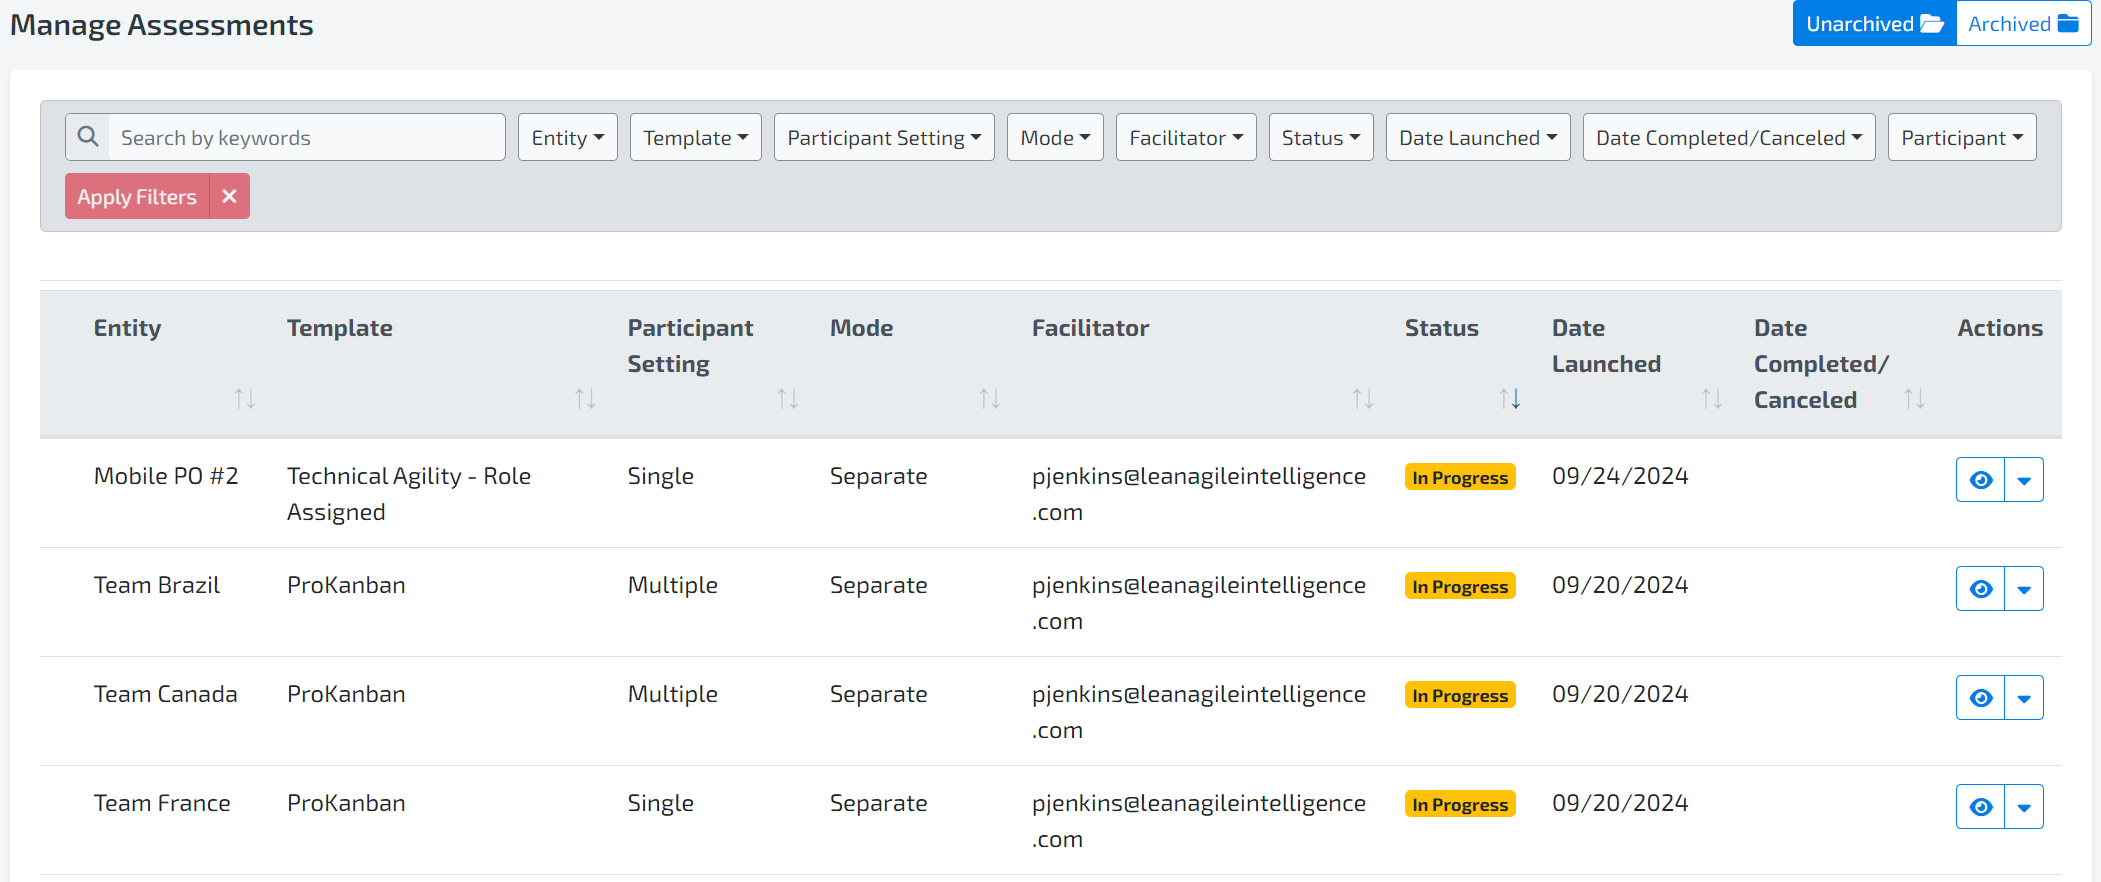
Navigate to Manage Assessment and click the Eye icon to open the Assessment Details.

Under Member Attributes to Collect from Participants, you can see which attributes are being gathered. In Participant Details, you can view which participants have joined the assessment and the attributes they have selected.
4. VIEWING RESULTS
Results Page
After an assessment is completed, you can view the results on the Results Page. This data can be viewed at the Organization, Group, and Entity levels.

You can also use our filter to select specific Member Attributes data you want to see in the calculations across all the Results dashboards.
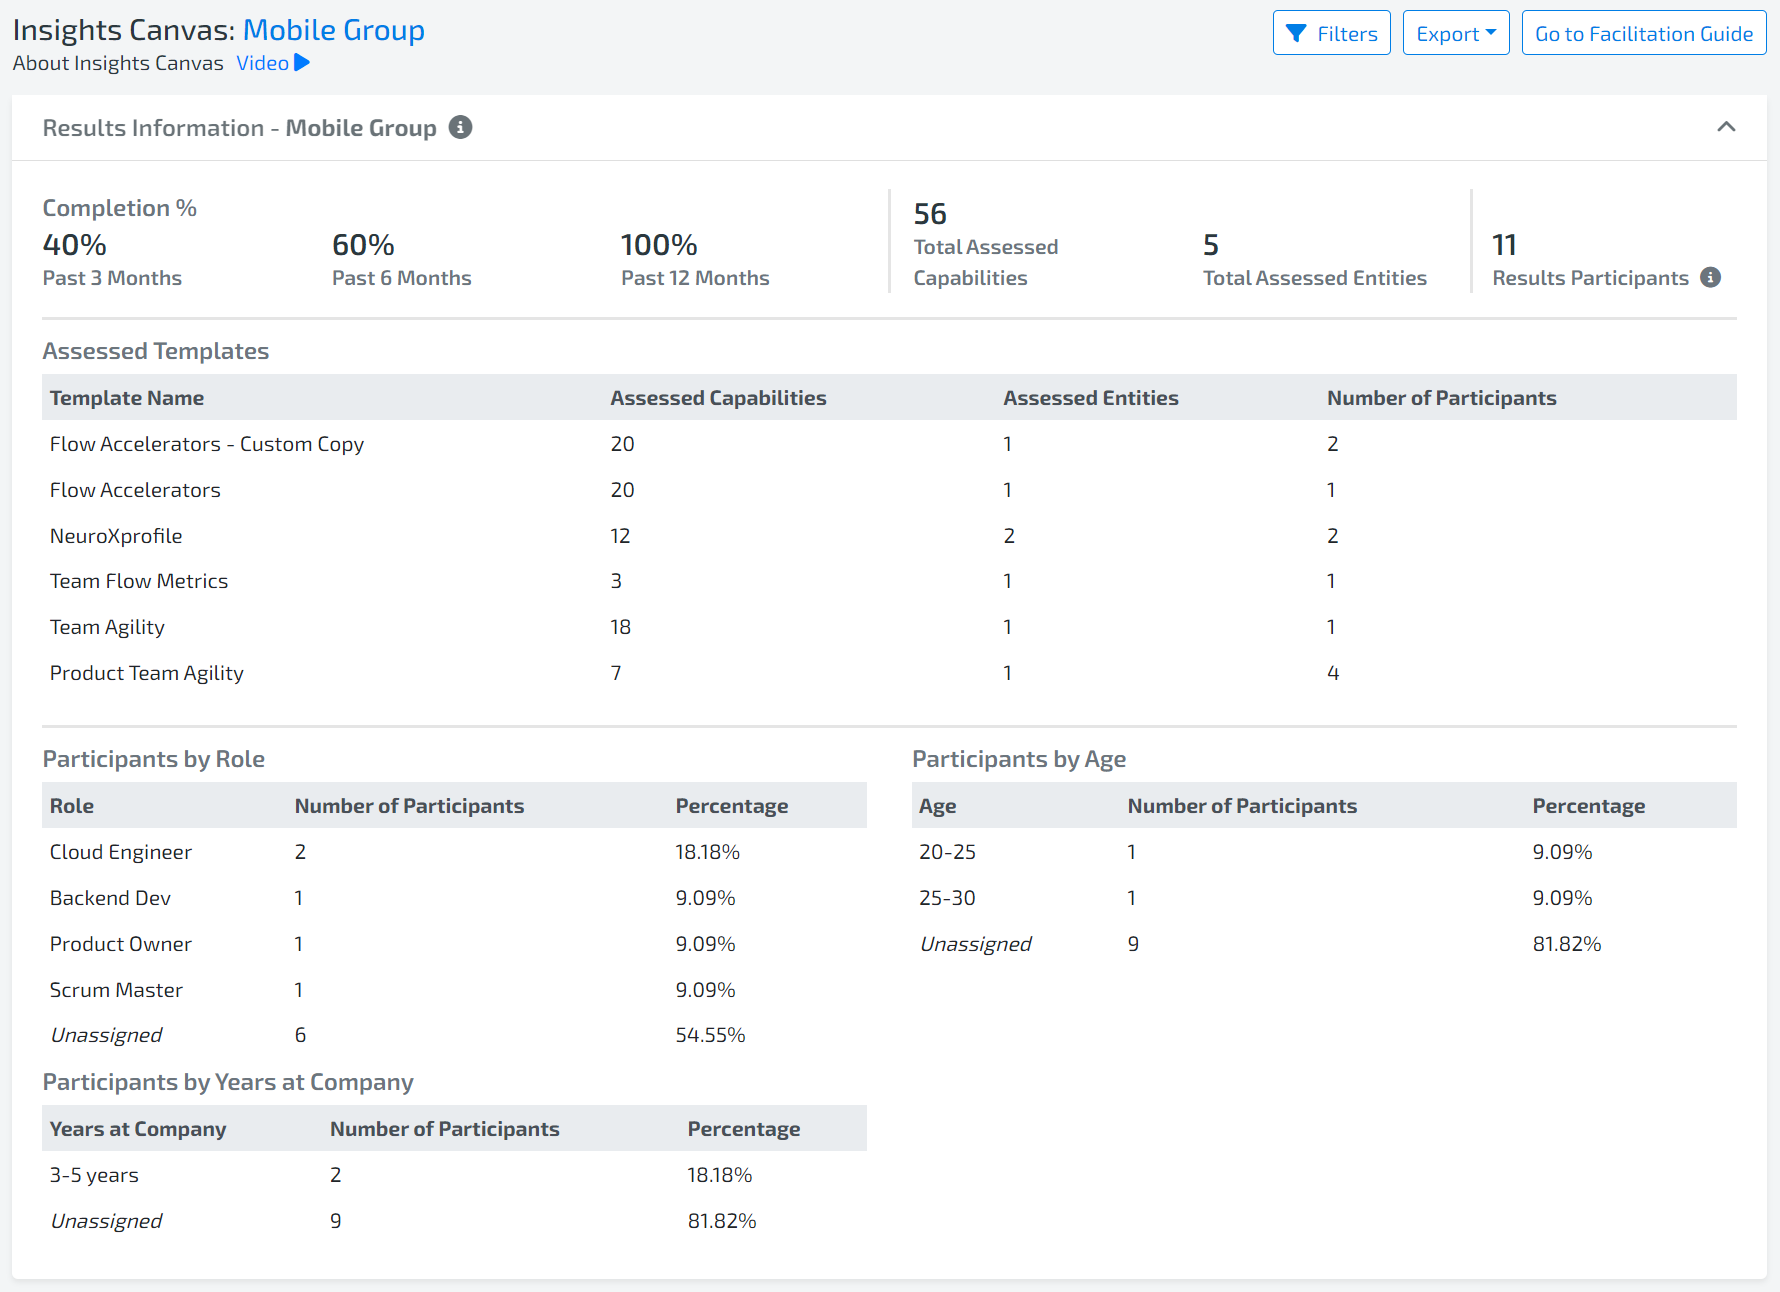
Insight Canvas:
The total number of participants and percentage of participants for all assessments can be found in the Results Information widget. Click to expand this section to view the participants grouped by the enabled Member Attributes in separate tables.
Participants who did not have a Member Attribute assigned will appear in the Unassigned row.
Votes Grouped by Member Attributes:
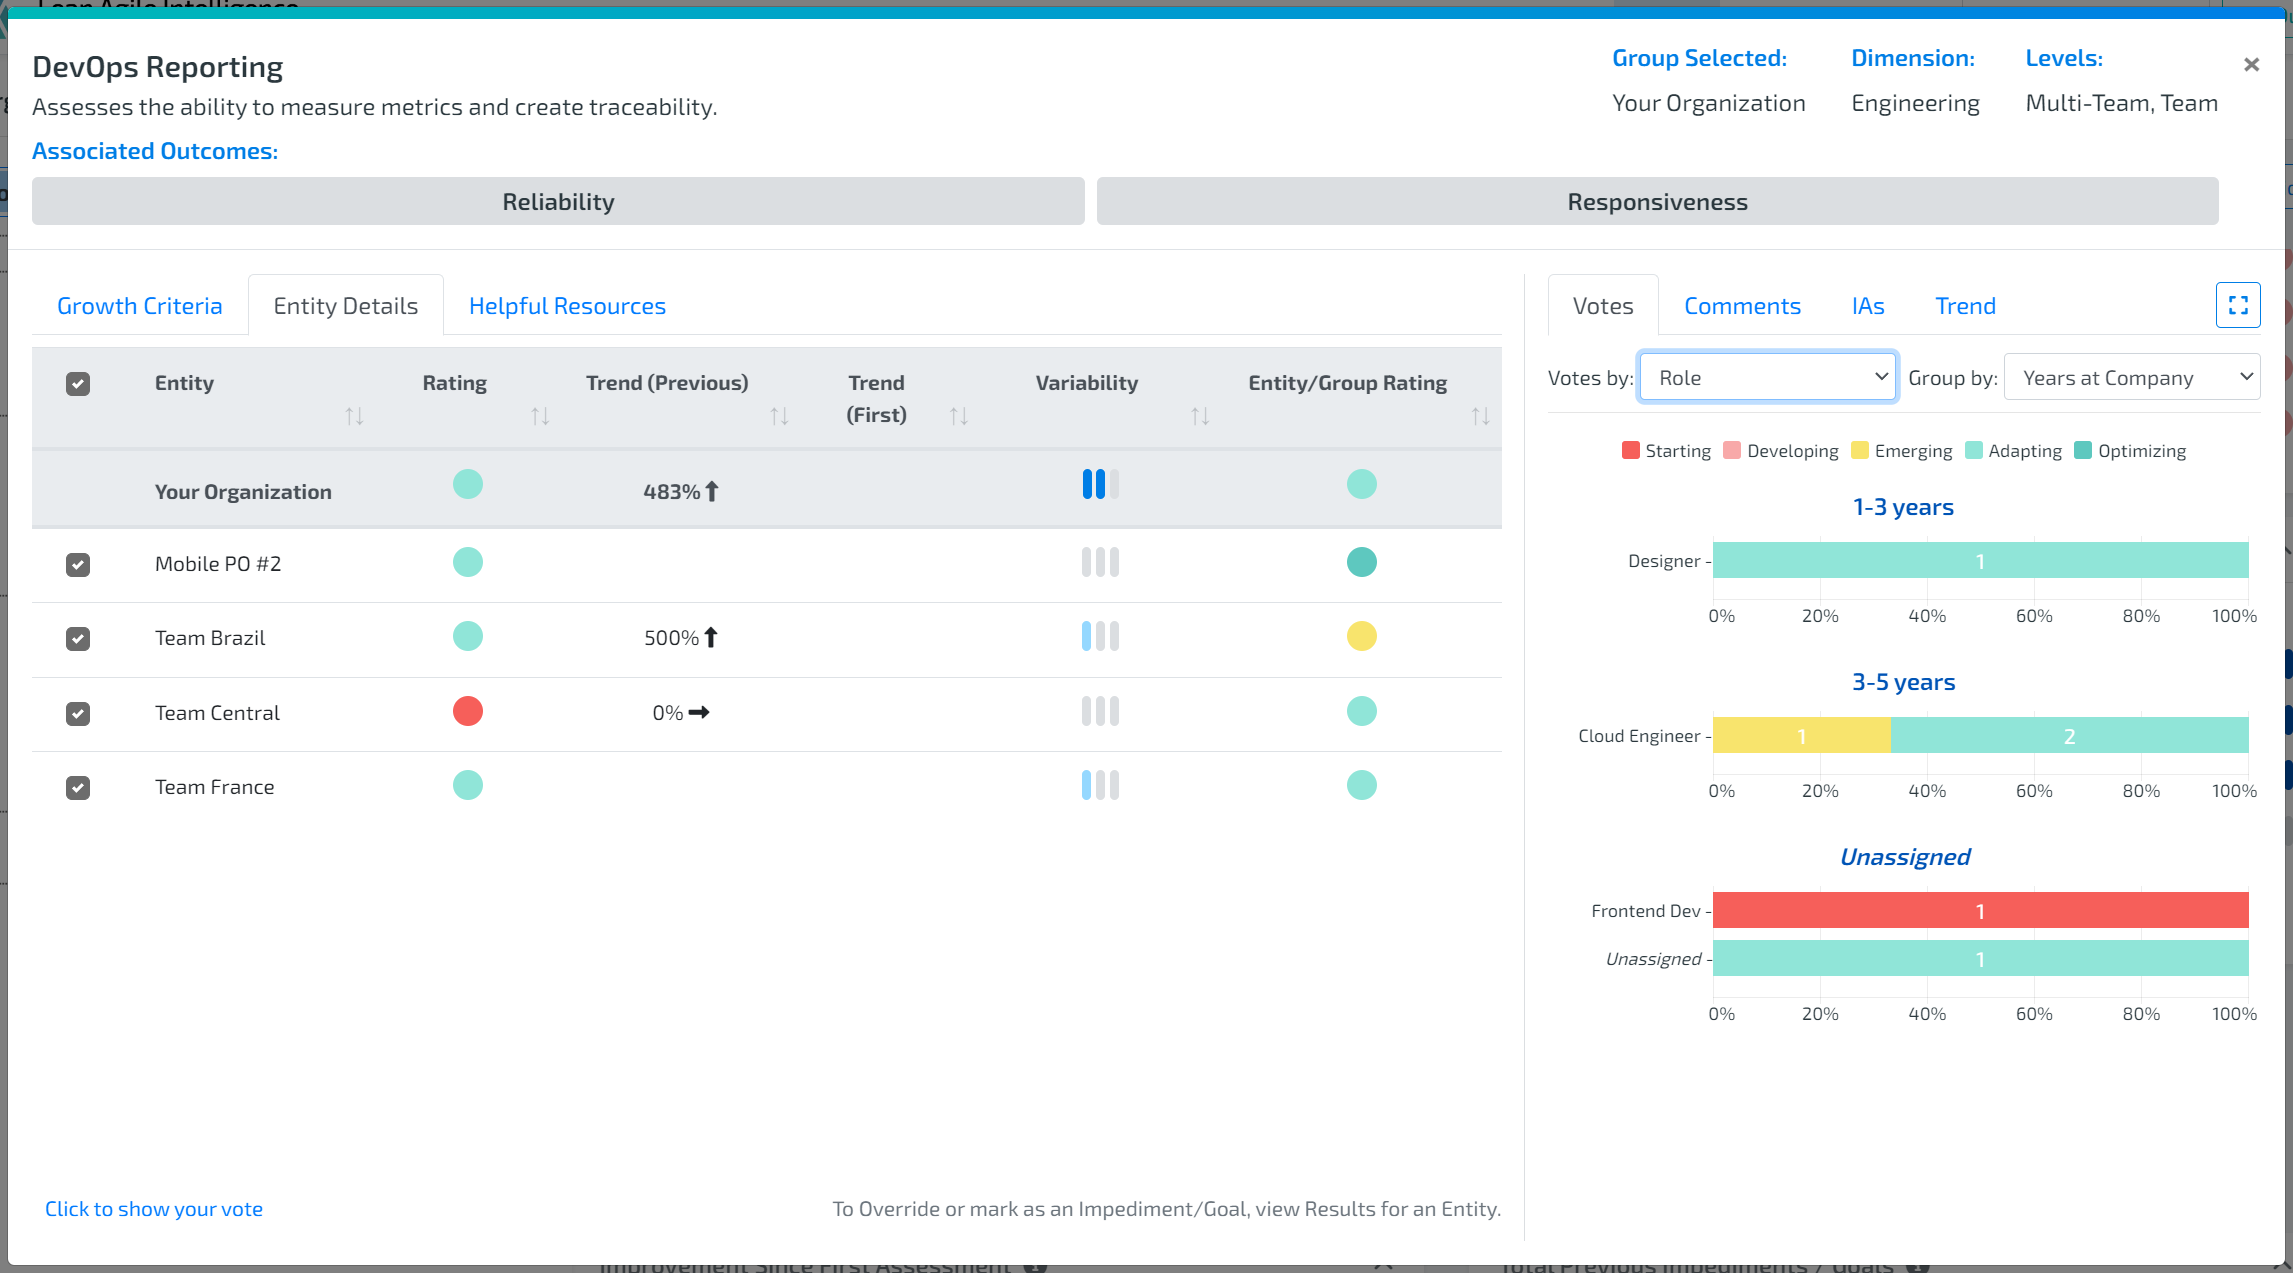
To view how votes are segmented by Member Attributes, drill down into a capability from the Results Page.
Use Capability Trends to navigate to the desired capability.
In the drilldown, select the Votes tab on the right.
Under Votes By, you can select between Stage, Rating, or any available Member Attribute.
If multiple Member Attributes are enabled, you can further group data by selecting the Group Up option to divide the results by additional attributes.
These detailed views allow you to analyze how different segments of participants have voted, giving deeper insights into capability trends across various groups in your organization.
Want more information? Watch our video on Custom Member Attributes.